How do I resize my content to a compatible resolution?
There are many different websites or software that can change/reduce the resolution of image and video files. We recommend using any of the below depending on the file format.
Image Content (JPG, PNG)
Windows 11 has a built in resize setting on the default image preview application. Please see below on the steps to do this.
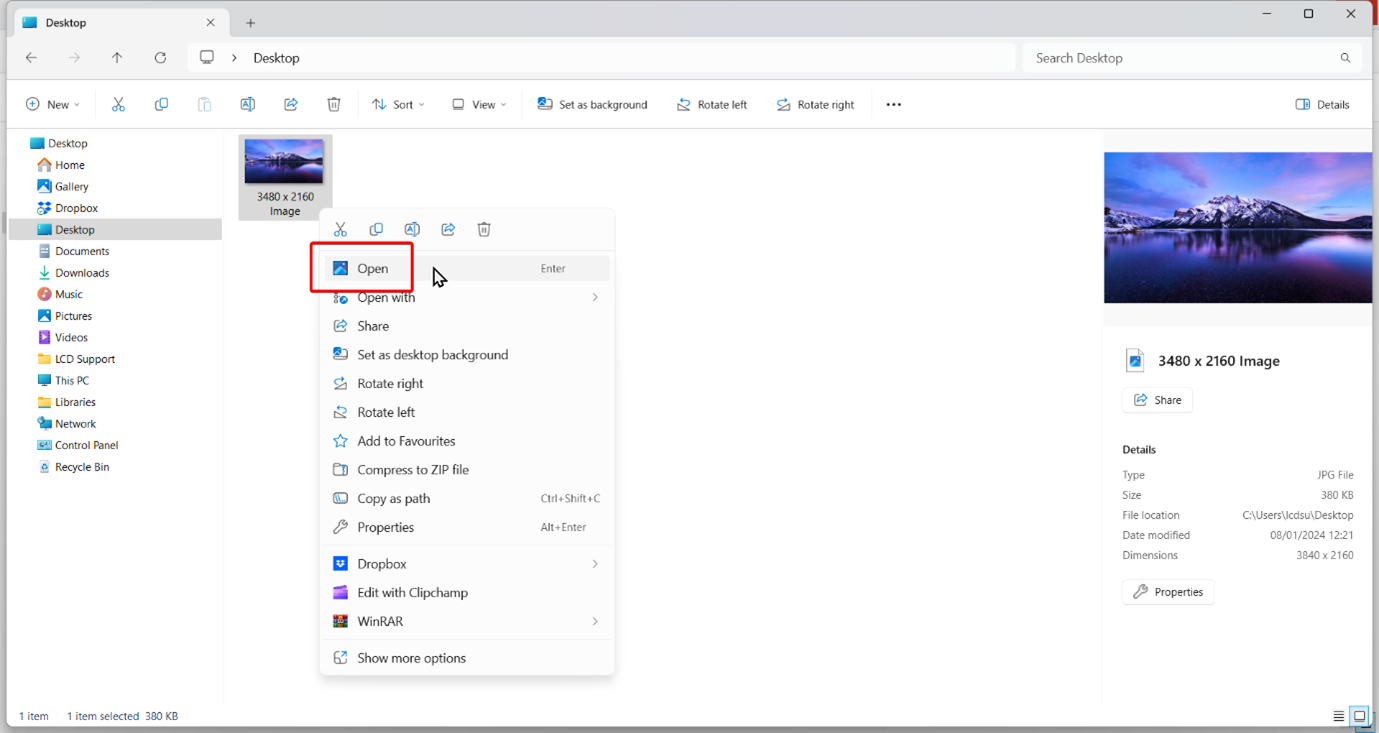
1 of 6. Open the image file you wish to resize in the default Windows 11 ‘Photos’ application. You can do this by either double left clicking the file or right clicking and selecting ‘Open’.
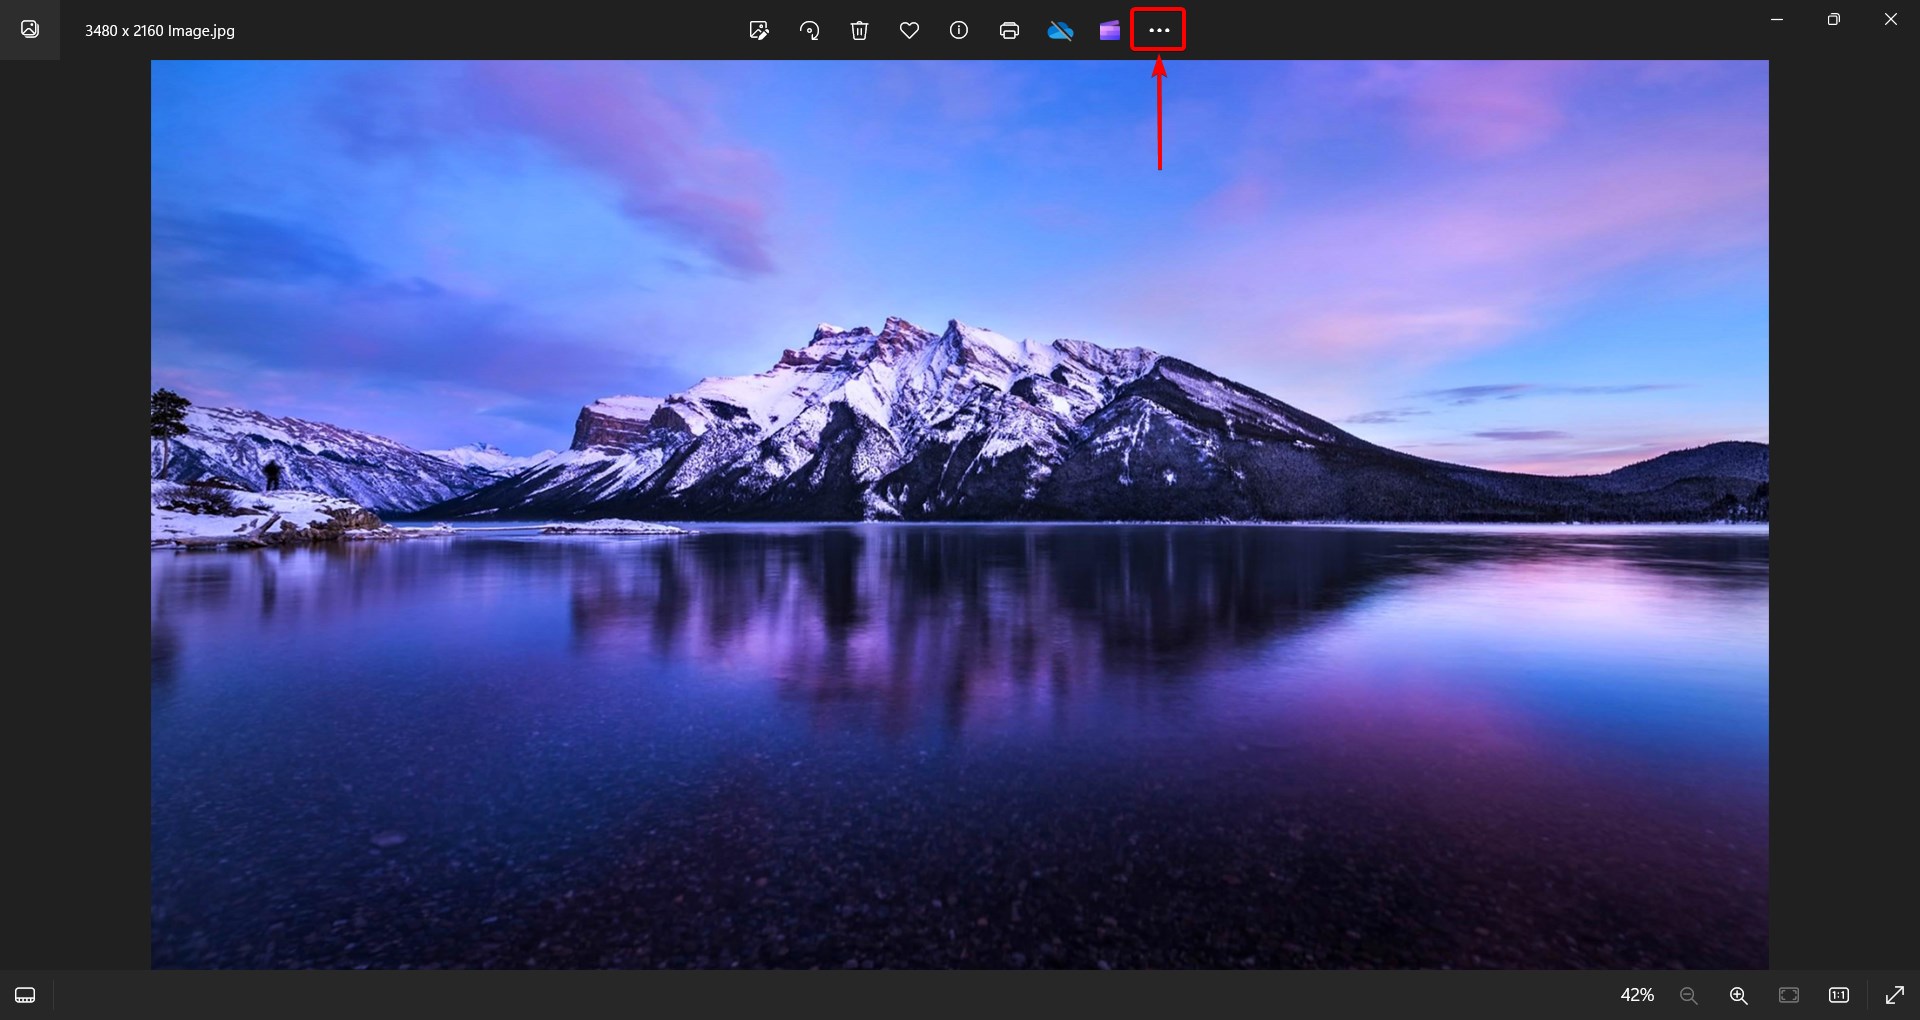
2 of 6. Open the image file you wish to resize in the default Windows 11 ‘Photos’ application. You can do this by either double left clicking the file or right clicking and selecting ‘Open’.
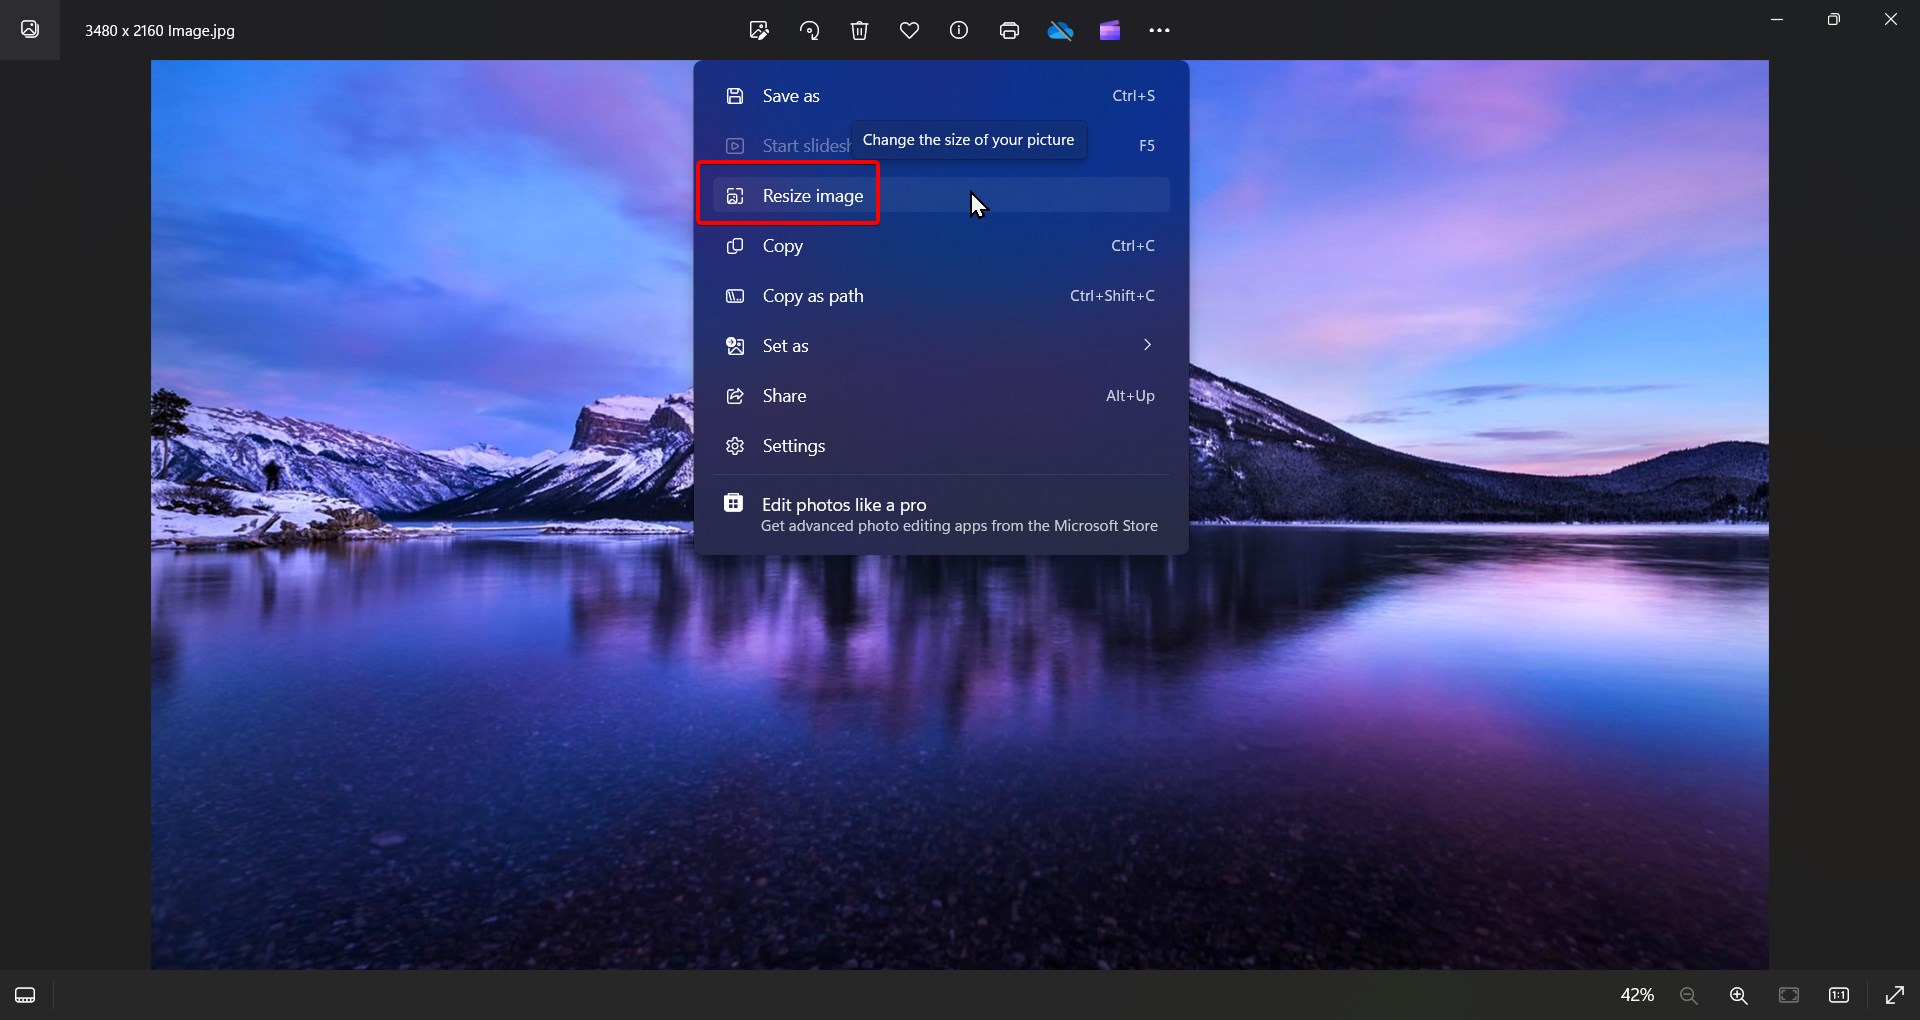
3 of 6. Open the image file you wish to resize in the default Windows 11 ‘Photos’ application. You can do this by either double left clicking the file or right clicking and selecting ‘Open’.
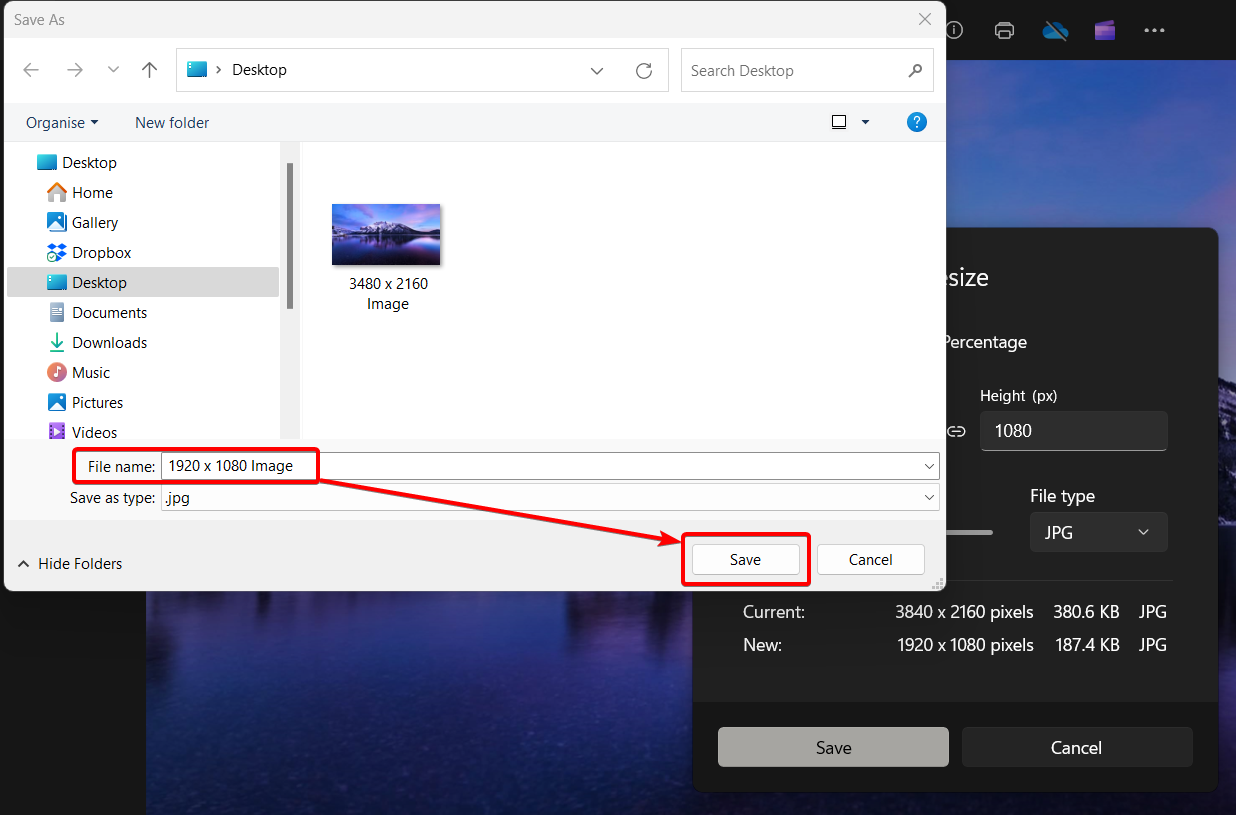
4 of 6. Open the image file you wish to resize in the default Windows 11 ‘Photos’ application. You can do this by either double left clicking the file or right clicking and selecting ‘Open’.
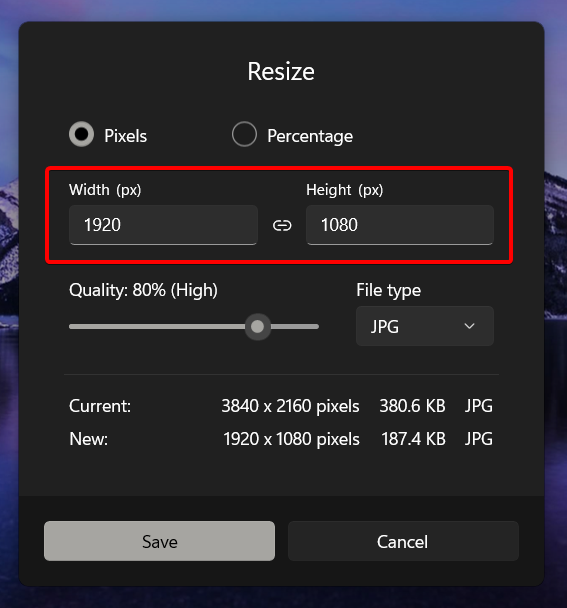
5 of 6. Open the image file you wish to resize in the default Windows 11 ‘Photos’ application. You can do this by either double left clicking the file or right clicking and selecting ‘Open’.
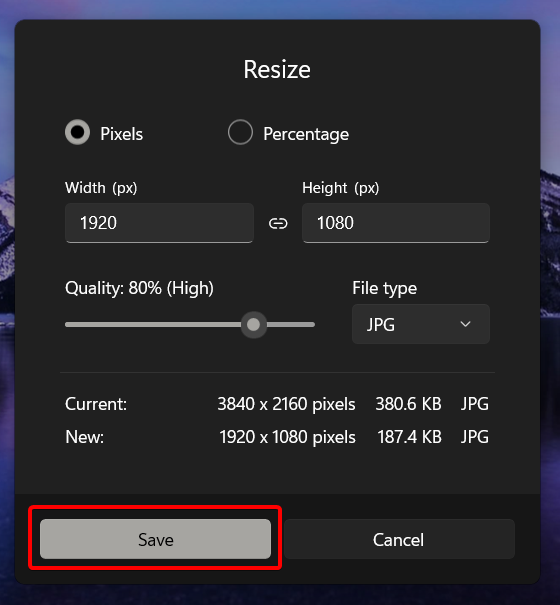
6 of 6. Open the image file you wish to resize in the default Windows 11 ‘Photos’ application. You can do this by either double left clicking the file or right clicking and selecting ‘Open’.
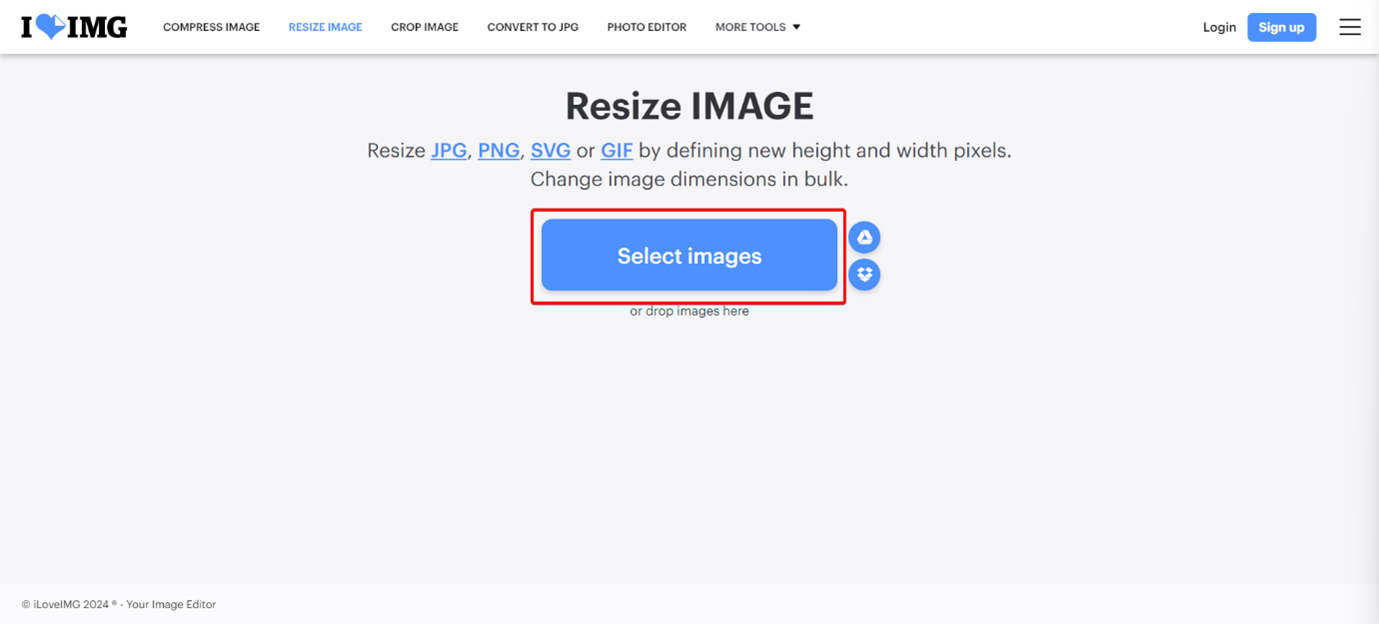
You can also use the iLoveIMG website (free webapp) to quickly resize multiple images at once. See below on the steps to do this.
1 of 9. Start by going to https://www.iloveimg.com/resize-image.
2 of 9. Click the ‘Select images’ button in the middle of the webpage.
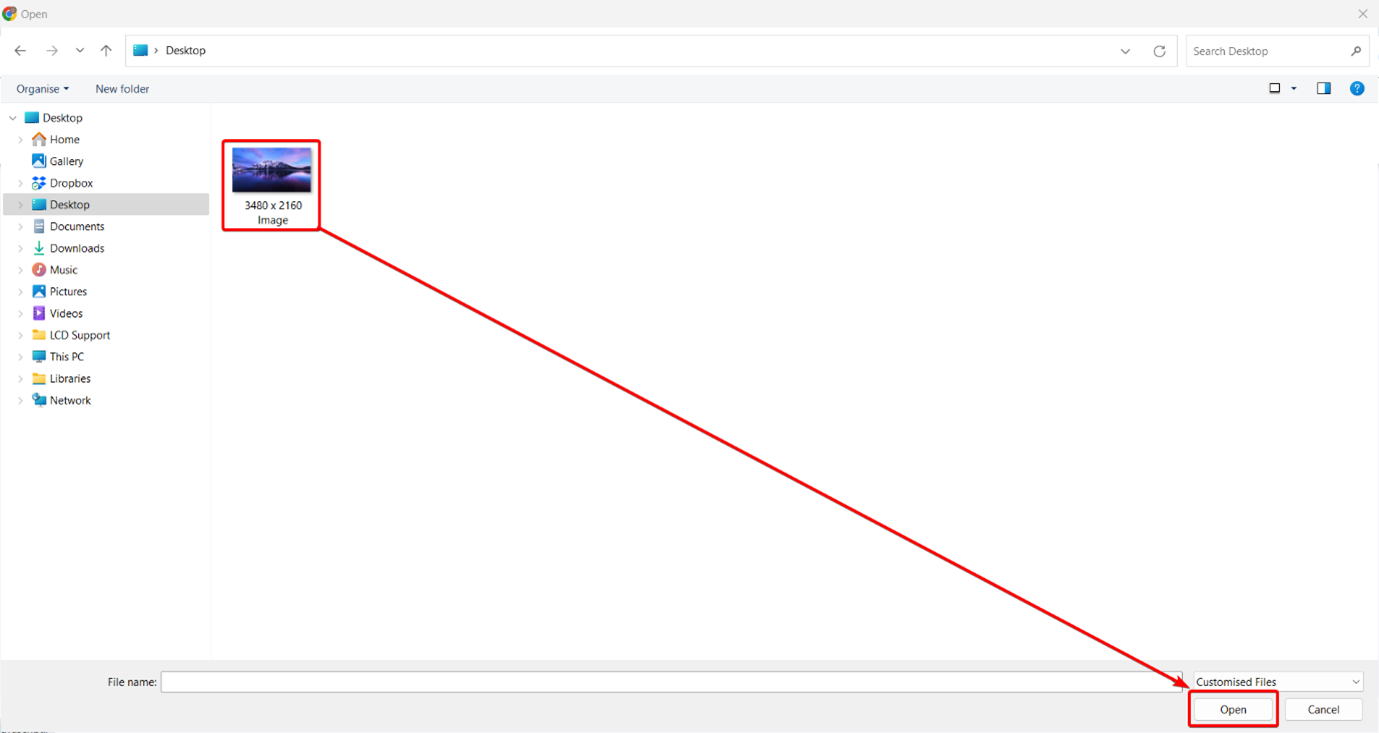
3 of 9. Select the image file(s) you wish to resize and click ‘Open’ at the bottom right.
4 of 9. Select the ‘By pixels’ option on the right side of the webpage.
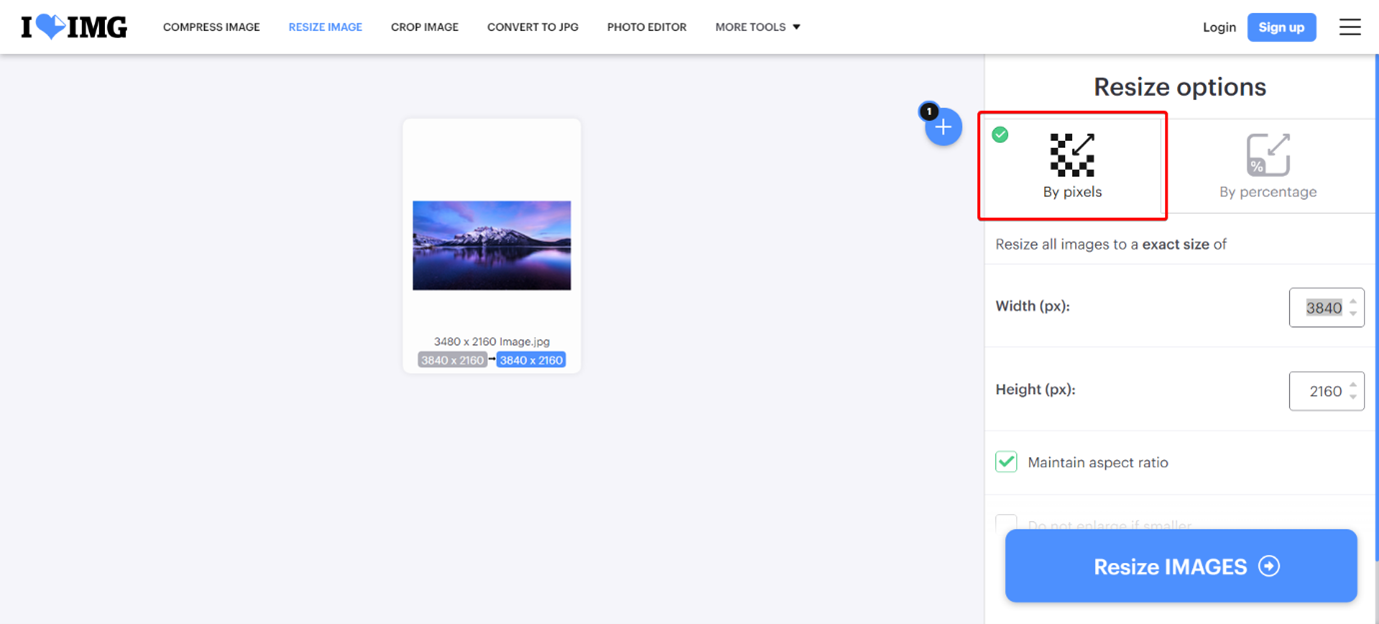
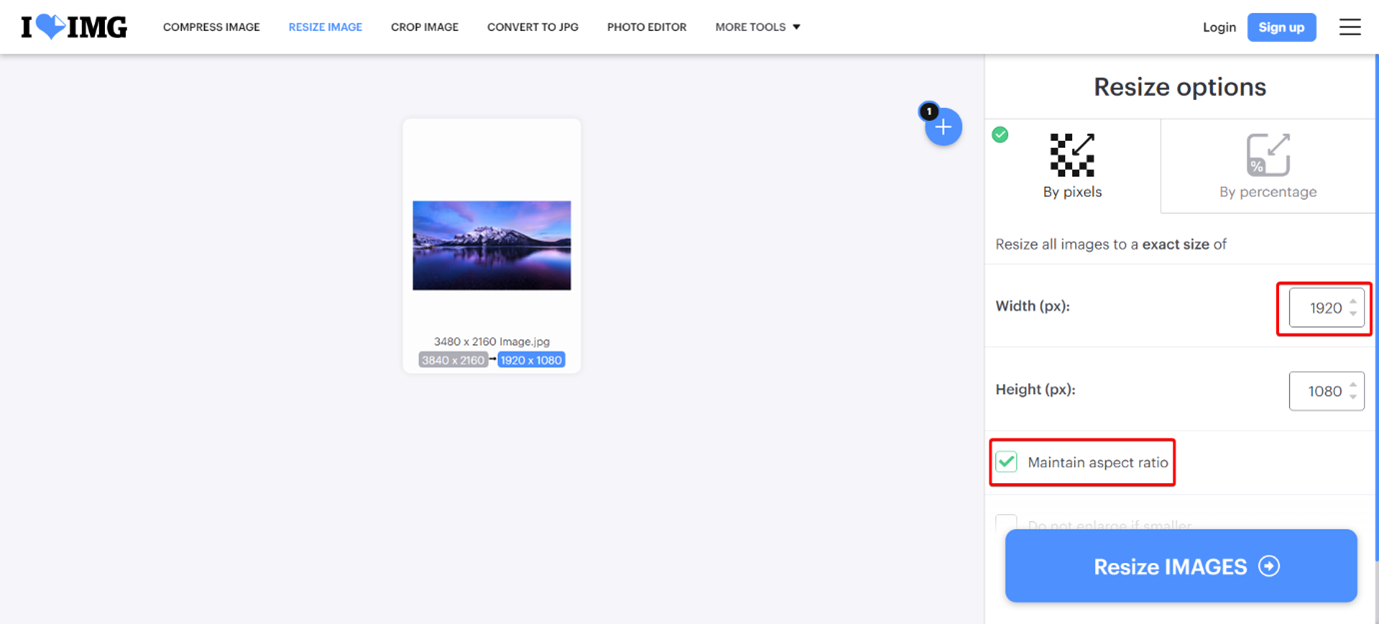
5 of 9. Change the resolution to the recommended format, i.e., 1920 x 1080 for FHD (Full High Definition) landscape players. You only need to change the height or the width as the aspect ratio is locked automatically to keep the correct proportions.
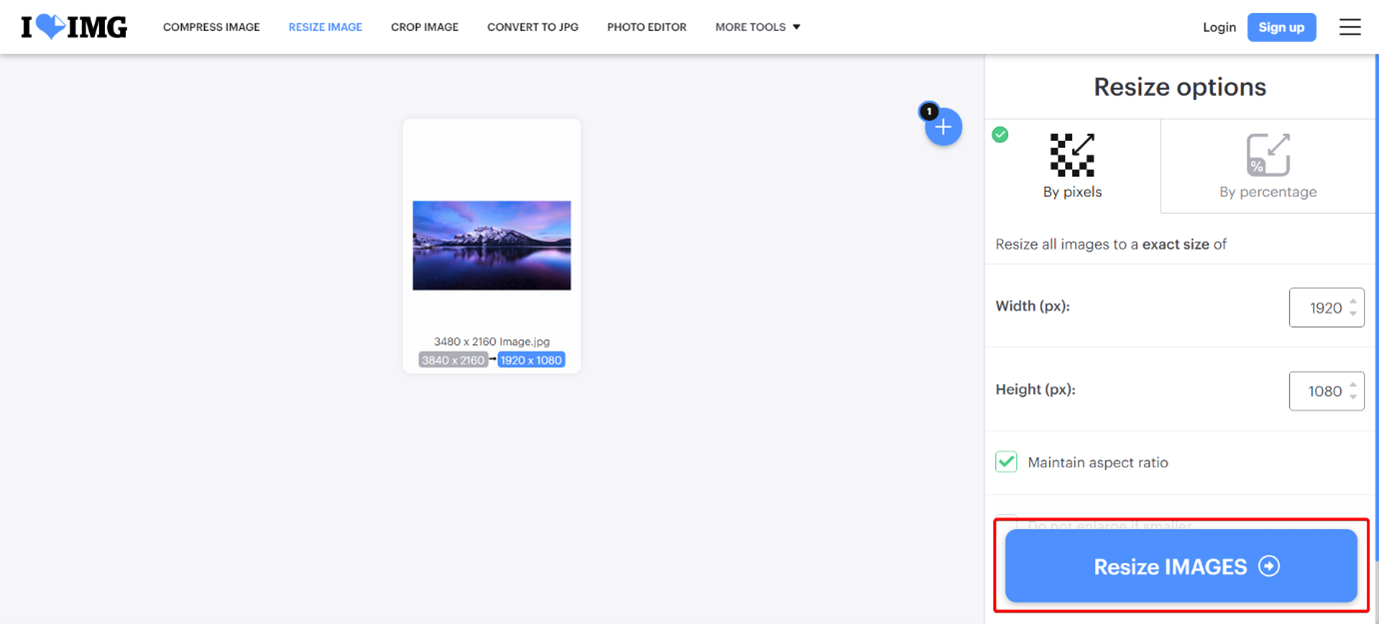
6 of 9. Click the ‘Resize IMAGES’ button.
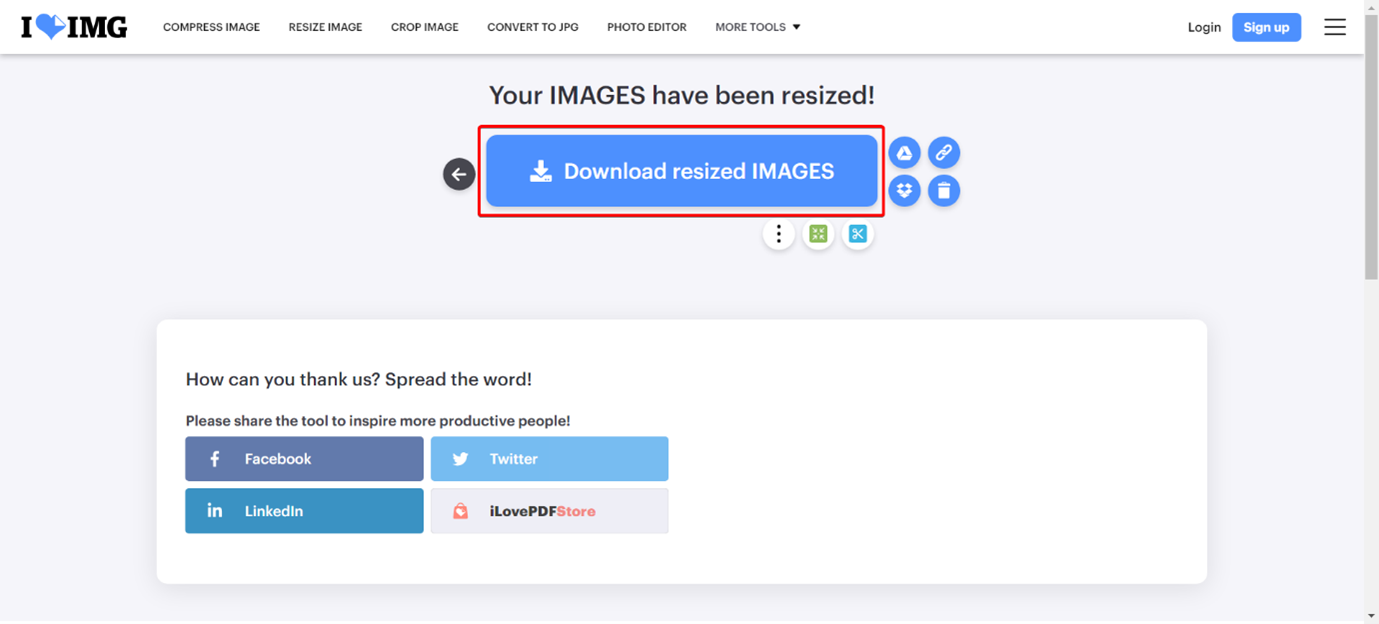
7 of 9. Click the ‘Download resized IMAGES’ button to download the newly resized image file(s).
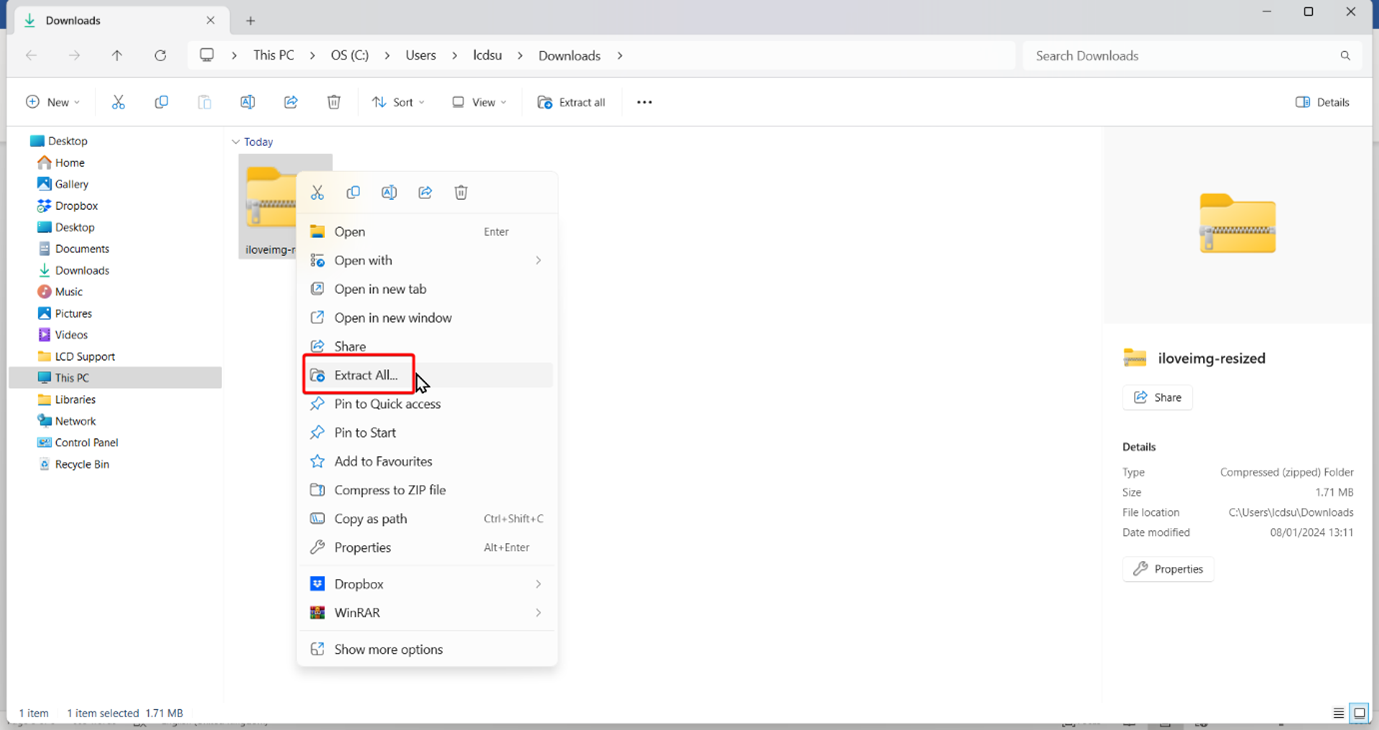
8 of 9. If resizing multiple files, a ZIP folder will be created instead of the singular image. This needs to be extracted. This can be done by going into your downloads folder, right clicking the ZIP file and clicking ‘Extract All…’.
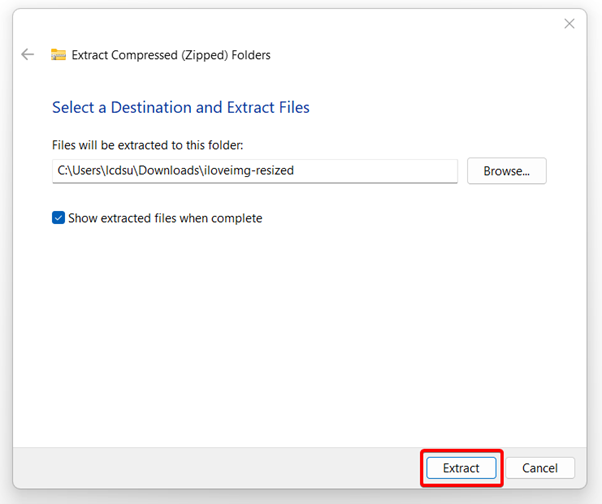
9 of 9. Finally, click ‘Extract’. This will create a new folder with the files you have previously resized.
Videos (MP4, AVI, MPG)
Windows 11 has a free application named Microsoft Clipchamp which can be used to edit, crop and even resize video content. Please see the steps below on how to resize video content to a compatible format.
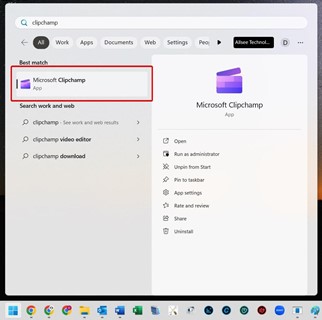
1 of 8. Click the Start button on the taskbar.

2 of 8. Type ‘clipchamp’ on your keyboard and click the Microsoft Clipchamp application.
3 of 8. Click ‘Create a new video’.

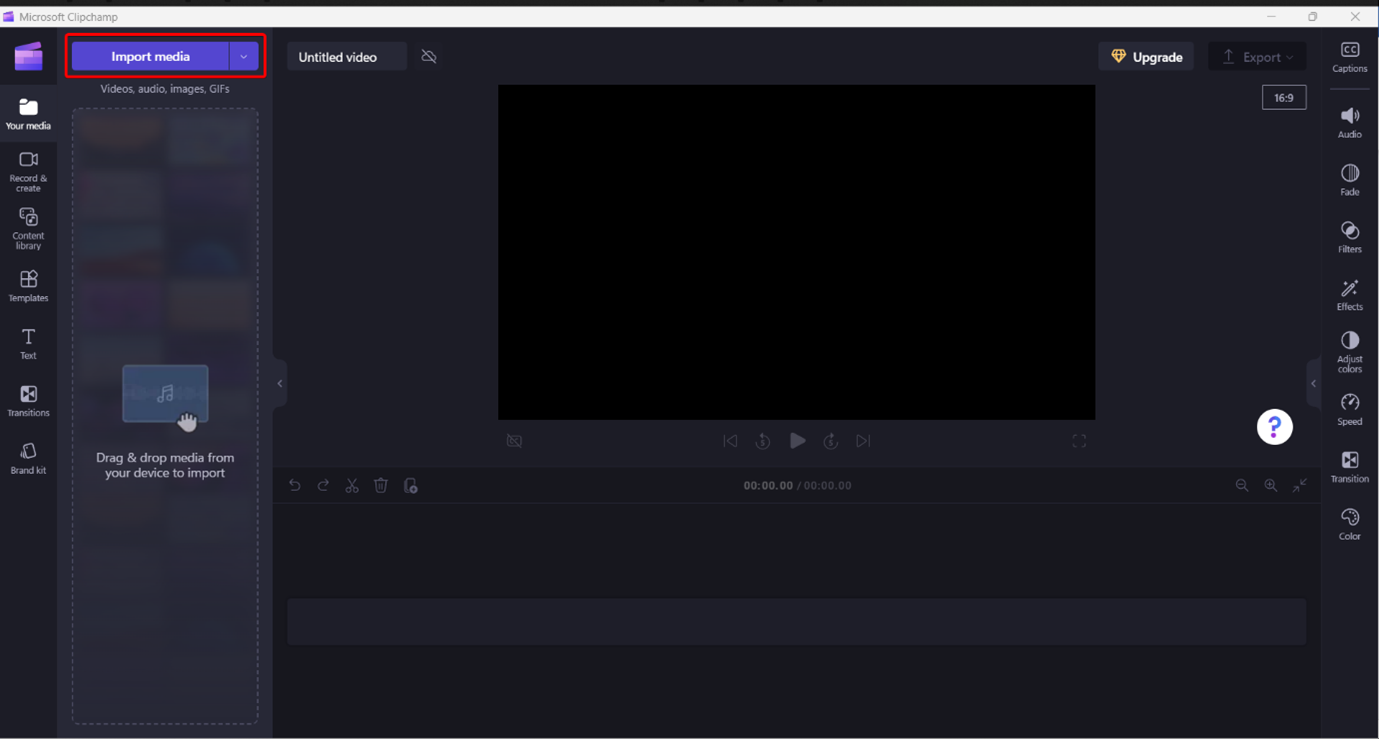
4 of 8. Click ‘Import media’ from the top left of the application.
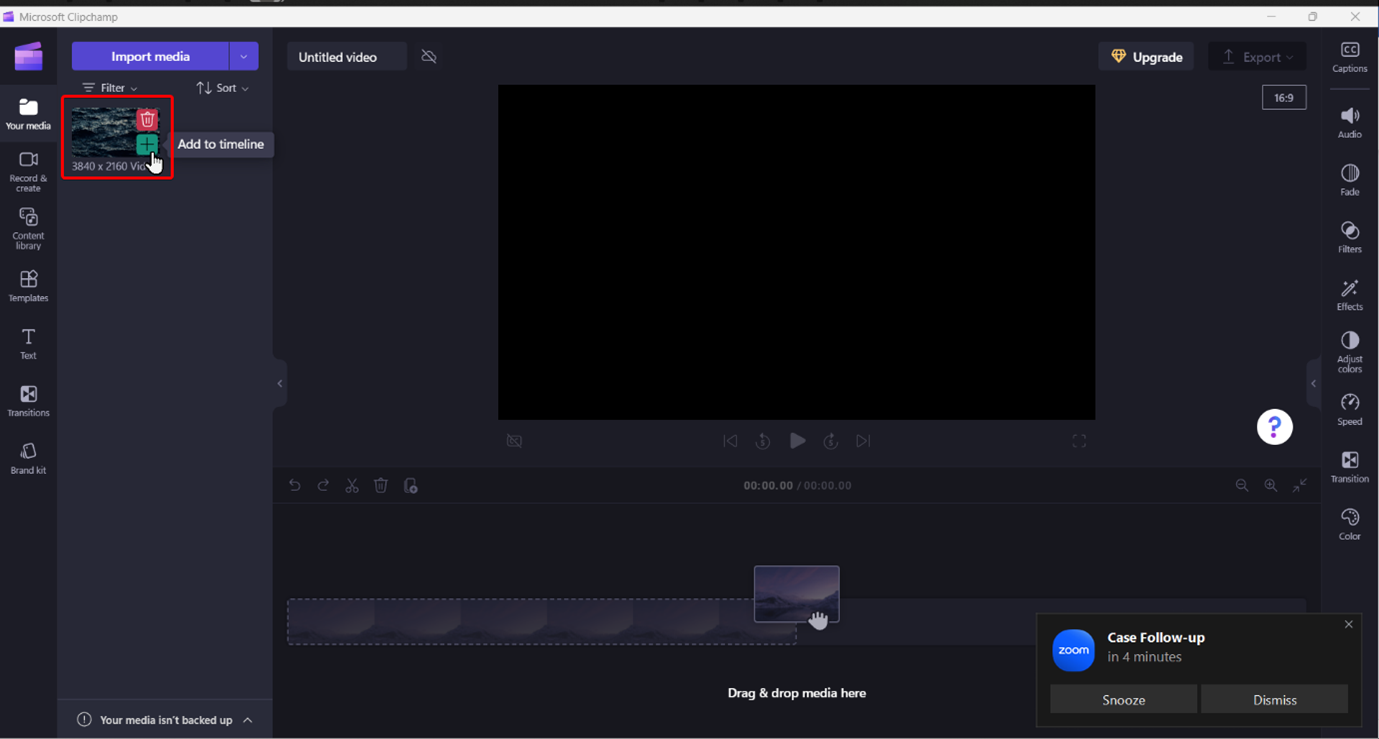
5 of 8. Select the video file you wish to resize and click ‘Open’ at the bottom right.

6 of 8. Hover your mouse over the video file thumbnail and select the plus icon to add the file to the timeline.
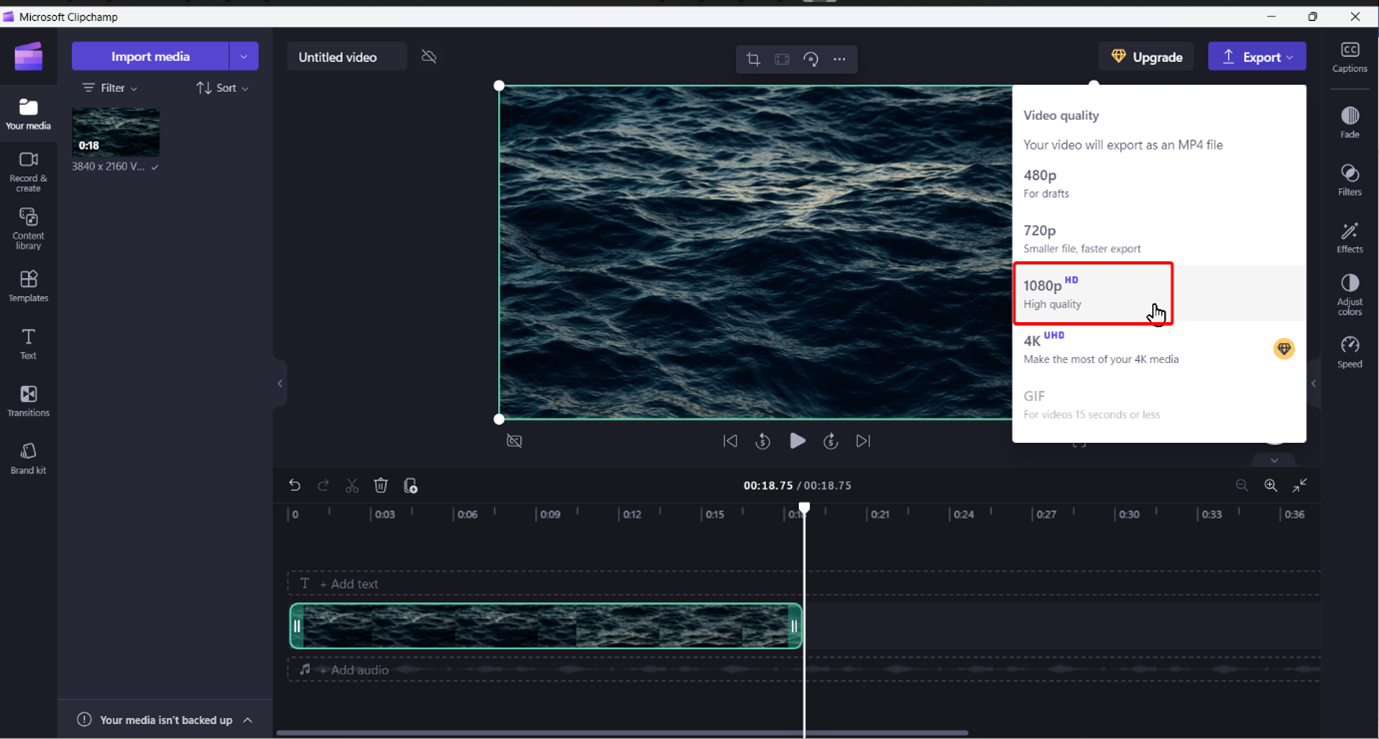
7 of 8. Click ‘Export’ at the top right corner followed by ‘1080p HD’.
8 of 8. Once the file has been exported it will save directly to your downloads folder.

Please note: The exportation duration will depend on how large the video file is. Please be patient during the process.
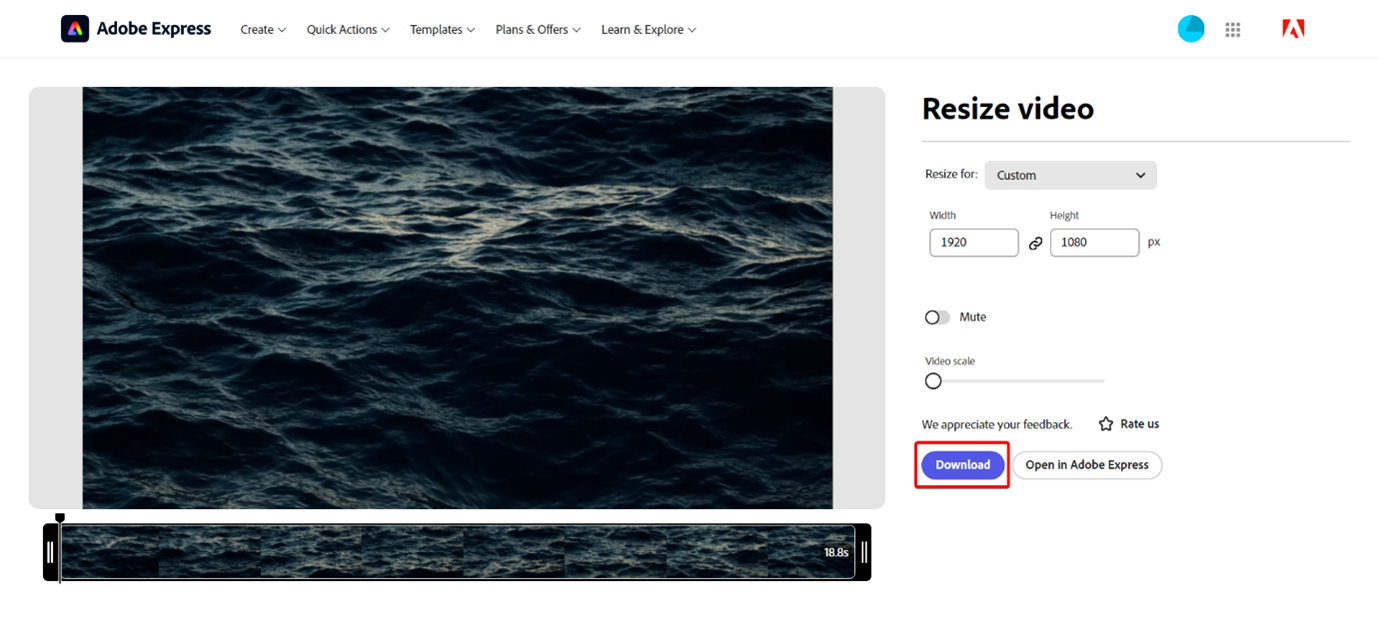
You can use the website Adobe Express (free webapp) to resize video content to a compatible format. See below on the steps to do this.
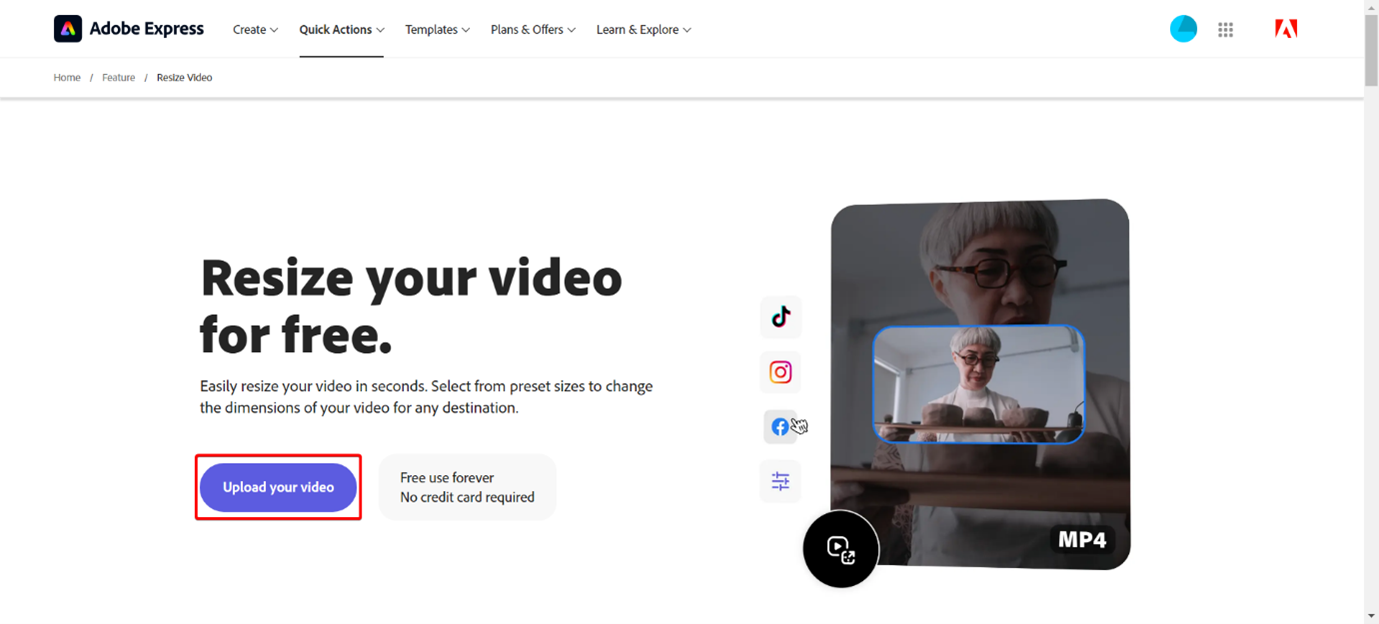
1 of 7. Start by going to the website https://www.adobe.com/express/feature/video/resize.
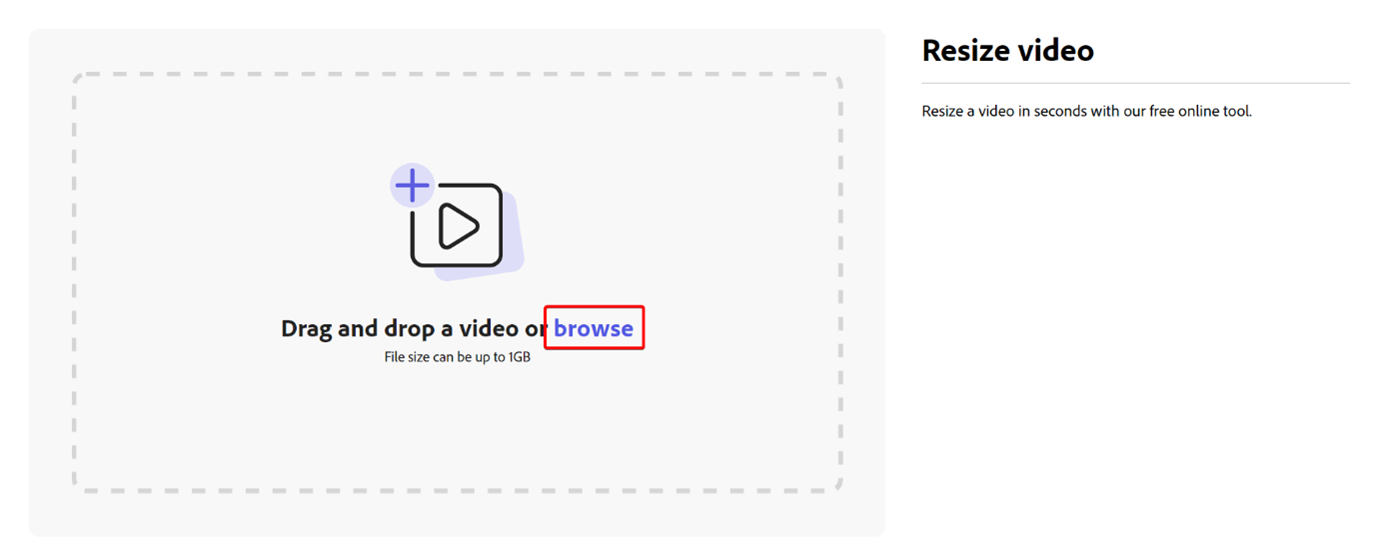
2 of 7. Click the ‘Upload your video’ button.
3 of 7. Drag your video file from your Windows 11 file explorer or click ‘Browse’.
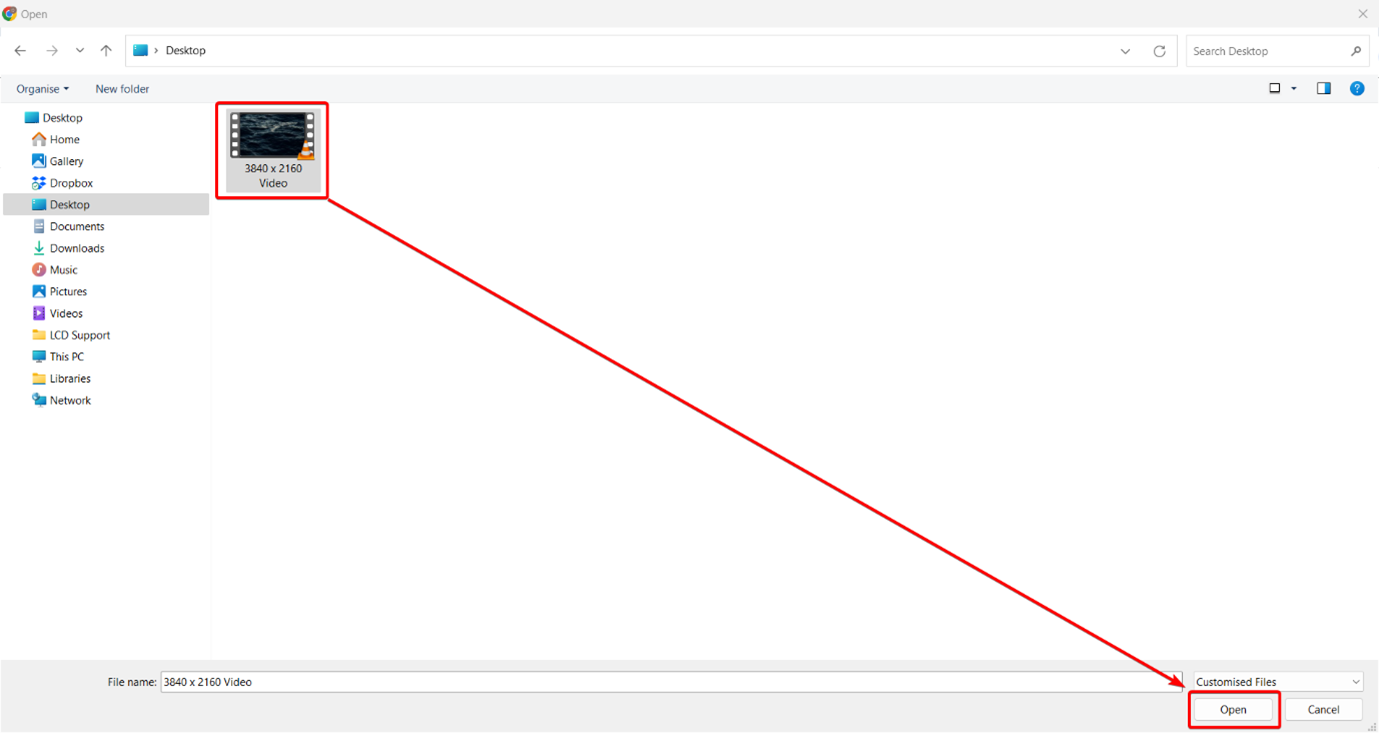
4 of 7. Select the video file you wish to resize and click ‘Open’ at the bottom right.
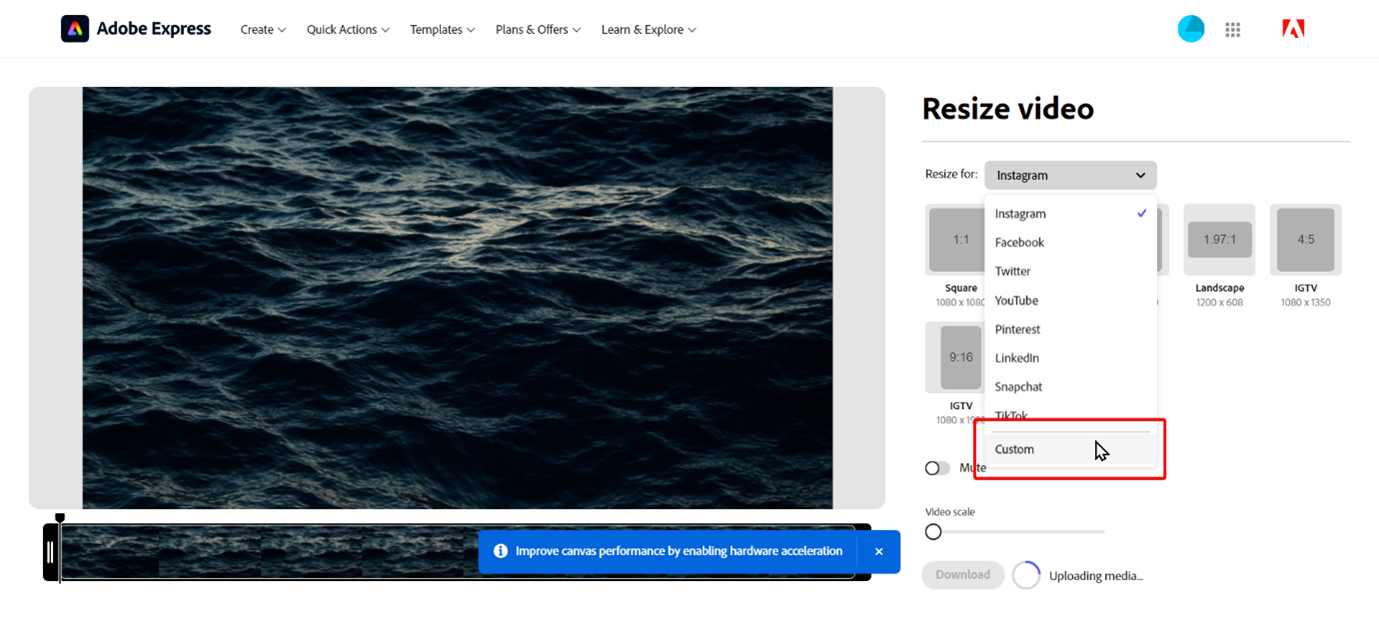
5 of 7. Select ‘Custom’ from the dropdown box.
6 of 7. Change the resolution to the recommended format, i.e., 1920 x 1080 for FHD (Full High Definition) landscape players. You only need to change the height or the width as the aspect ratio is locked automatically to keep the correct proportions.
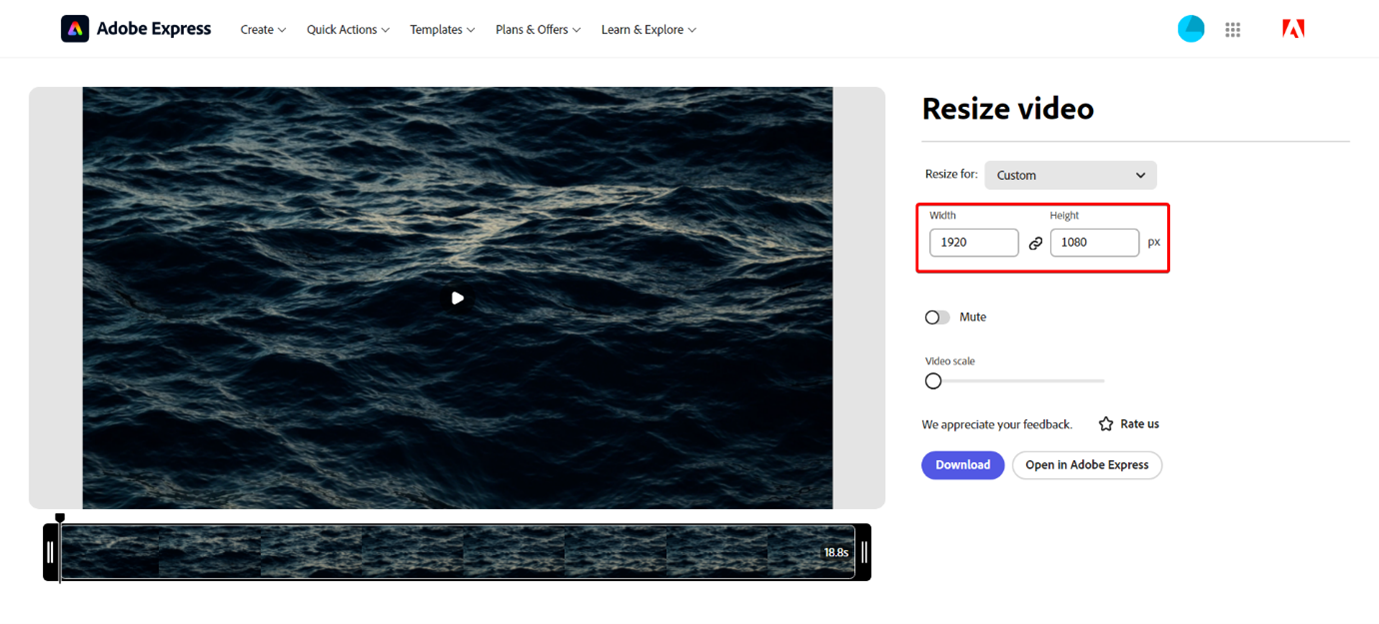
7 of 7. Click ‘Download’ to download the newly resized video file.
Please note: The exportation duration will depend on how large the video file is. Please be patient during the process.
You may have received an error that a file resolution is not supported by My Signage Portal as shown below.
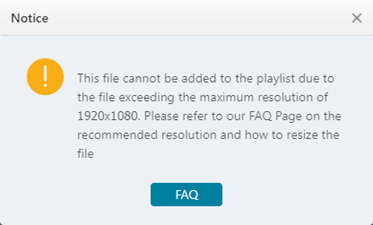
The message will only appear if the resolution of the file exceeds the resolution of the template being used. In this case, first check the resolution of the player to see the maximum resolution it can support. If the player is FHD (Full High Definition) for example, the resolution of the file cannot exceed 1920 x 1080 for landscape or 1080 x 1920 for portrait.
If you’re not sure what the player resolution is you can find the ‘Resolution’ of a player by going into the ‘Player’ menu on your My Signage Portal account.
In the example below, this player has a resolution of 1920 x 1080 which means it’s FHD player that is currently set up in the landscape orientation. Any images that exceed this resolution will need to be reduced.

If you have a 4K player the resolution will be 3840 x 2160 for landscape or 2160 x 3840 for portrait. The same concept applies with the maximum resolution requirement except you can use resolutions lower than 4K (such as FHD 1920 x 1080) but cannot exceed the maximum resolution of the player.

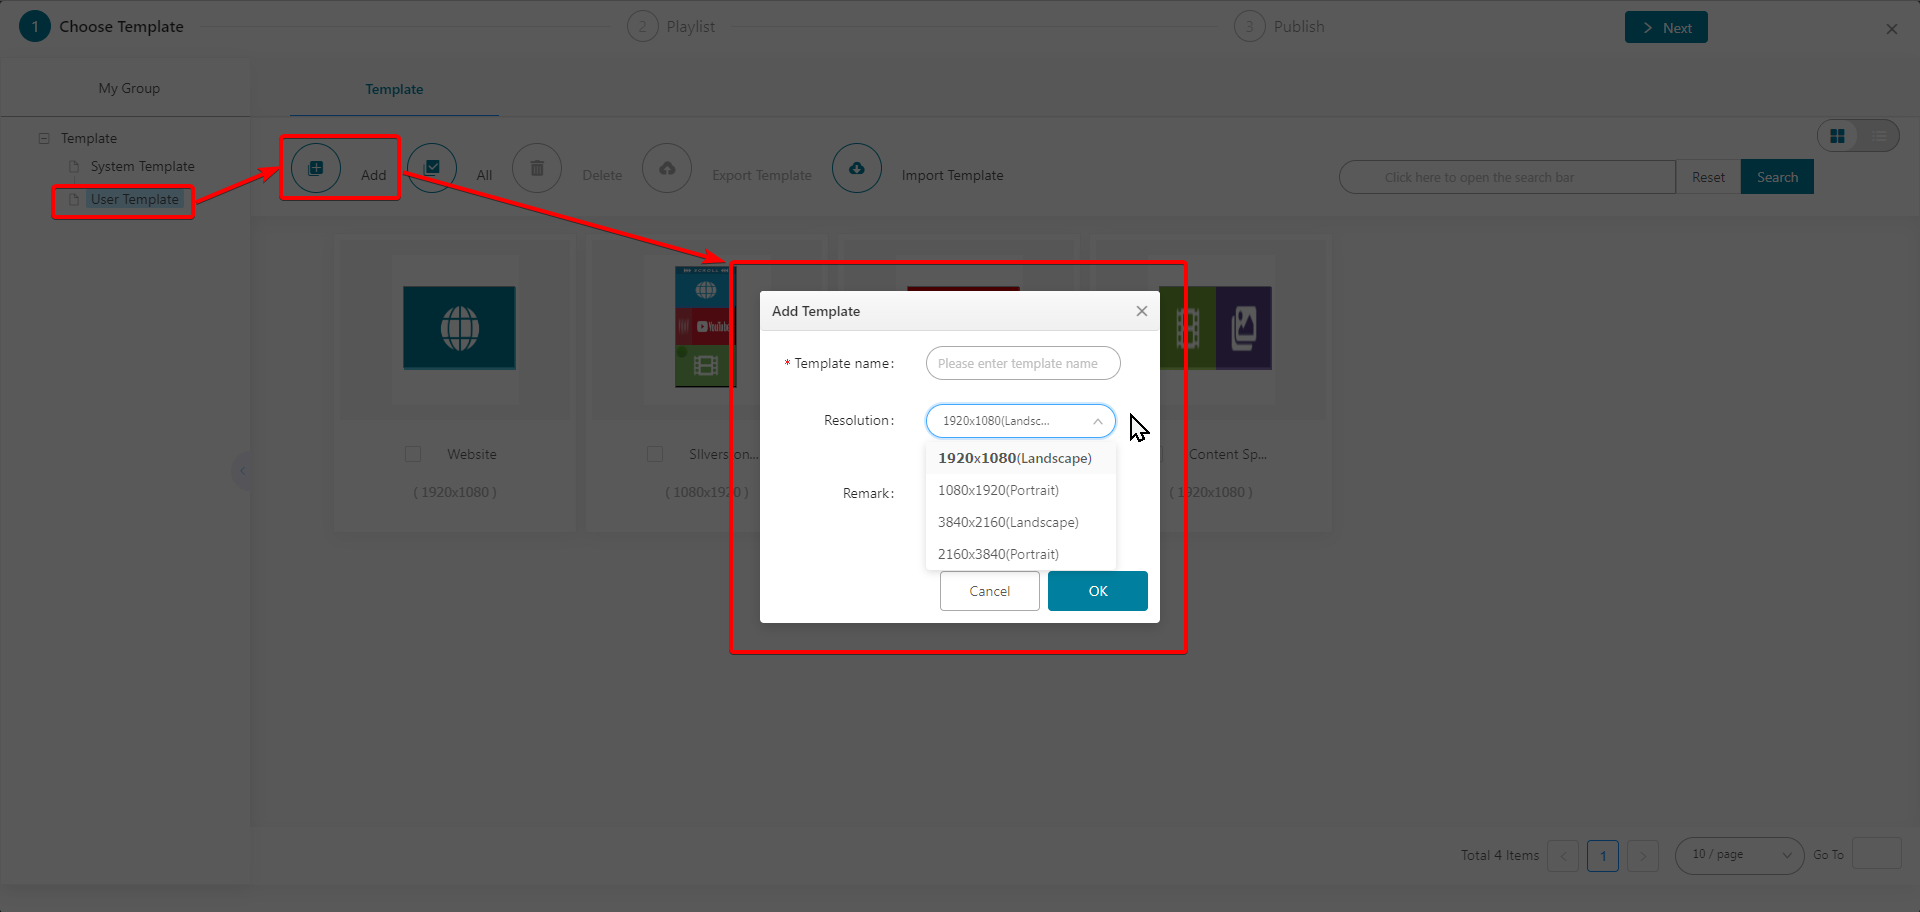
Make sure when selecting or creating a template you use the 4K resolution option if you are using a 4K player to avoid this error message. The default System Template options will include the word ‘4K’ if they are designed for a 4K player.
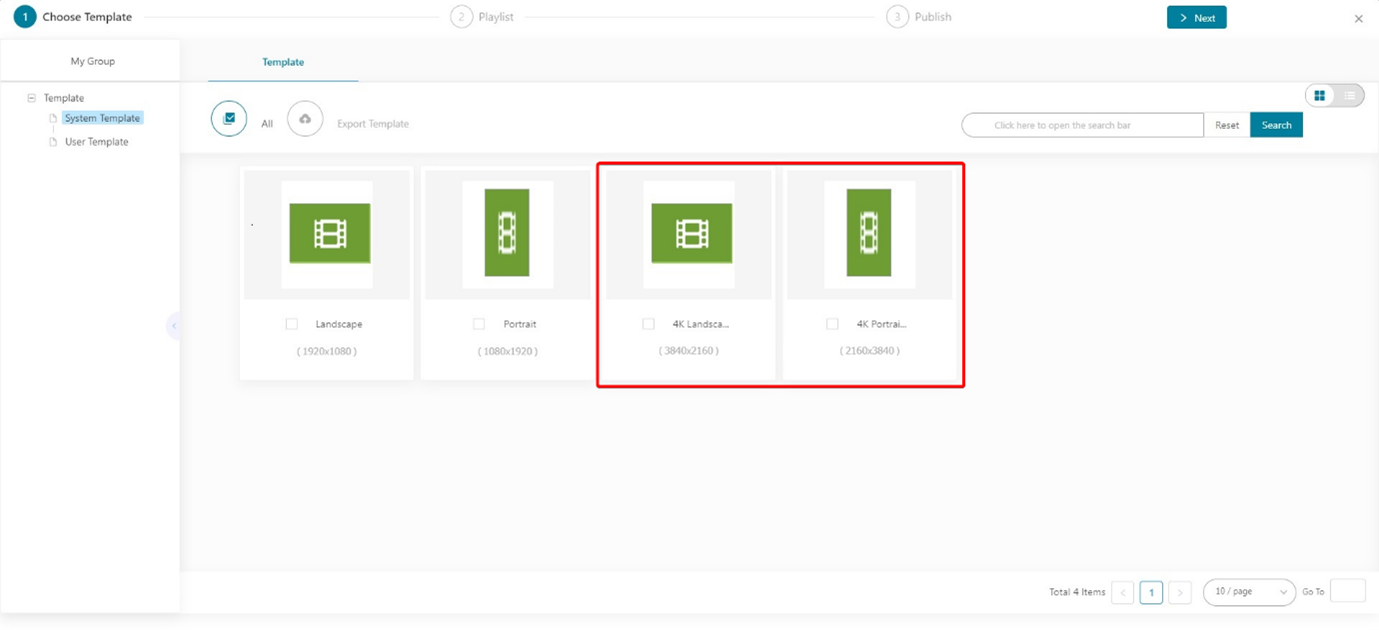
You can also create a template in 4K resolution if you wish to add different Zones aside from what the System Template’s provide.